This blog is about how I made a beautiful custom Pergola in the place of what was originally an old shed:
Now all that remains is a scrap heap of metal for recycle.
The vacant slab of concrete exposed a very dirty wall.
I also used cement patch up mix to repair some of the lower part of the wall.
I used a 3/8" cement drill bit to drill and anchor 1/2" lag screws about 6" from each corner.
With the four brackets in place I screwed in the 4 x 4 post and then attached an 8 foot long 2 X 6. Using the level I realized there was a one inch slant to the concrete slab below. But that was okay because I actually cut the post a couple inches longer than eight feet just in case.
I used the 2 X 6's for the sides as braces to hold the post steady until I was ready to permanently nail them up.
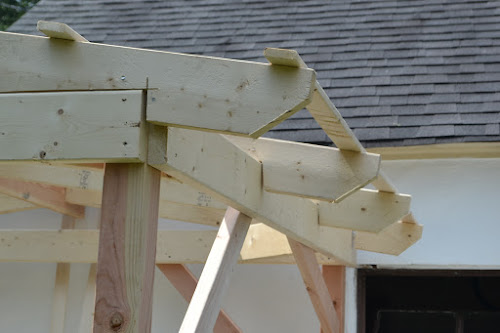
In order to make sure I cut my rafters correctly I used scrap pieces to make test cuts. Then I used them as patterns for the real rafters.
I temporarily screwed to the front and back fascia boards a piece of wood for the center beam to sit on until I could nail all the rafters in place. After I removed the temporary pieces the resulting look produced a nice center floating beam effect.
I used my Kreg Jig K4 and Ryobi clutch drill to make the pockets. I think the pockets provide the strongest joint for this application.
Pictured below is a window where the grill will be. So I made the brace a little higher than the others to avoid head banging.
I installed across the top of the rafters 1 X 2's to support the roofIng and give me something to nail it too.
I also cut the end of the rafters at a 45 degree angle for a "pergola" style look.
Now it was starting to take shape, except I was having a hard time with the center beam sticking out and what to do with it.
Eventually I angled 2 X 4's to add design to the look of the entrance. Then I had to cut and attach more 1 X 2's on the roof.
I also cut the bottom of the center beam on a 45 degree angle to match the rafters.
Here is a view from below.
I used Behr premium wood finish, cedar natural tone to paint the wood.
An old lantern added a nice decorative touch to the front of the pergola.
Pergolas add an excellent touch to any yard!


Nice write up Eric. Hand cut rafters are a real skill. Nice work.
ReplyDelete